Recreating the Doctor Who Time Tunnel in GLSL

The slit-scan effect is a classic analog special effect. It was most famously used during the “Stargate” sequence in 2001: A Space Odyssey, and a title sequence in Doctor Who. It was done “in camera”- no CGI here at all. It turns out this effect is easy to implement as a WebGL fragment shader, and the transformation can be done in only a few lines of code!
FilmmakerIQ produced a great explanation on how the method works practically. It’s not required watching, but it explains it visually and shows how it was done.
In case you prefer text: the idea is that you want an animation flying through an animated tunnel. You cut a slit in a card; behind that card is colored plastic brightly lit from behind. You open the camera’s shutter and pull it back from the slit. From the point of view of the camera, the slit shrinks and approaches the vanishing point at the center of the frame. Since you did a long exposure, the entire trail of the slit is exposed: it looks like a foreshortened rectangle.
The real trick is that you move the transparency horizontally (behind the slit) as the camera is moved backward. Successive slices of the texture on the transparency will get exposed to successively “further away” slices on the foreshortened rectangle on film. After you expose one frame, you reset the setup except you advance the start position of the transparency slightly. Rinse repeat and suddenly you have an animated tunnel.
It turns out you can perform the same tric with an arbitrarily-shaped “slit.” Instead of a line, your slit can be a square, a circle, or probably anything. The second-most famous use of the slit-scan showed multiple shapes off: for the Doctor Who time-tunnel, there’s even a TARDIS-shaped effect!
That’s enough intro. Let’s start implementing the sequence I found most intriguing: the circular tunnel from Doctor Who. Don’t forget that the examples here are all live: you can tweak them and the visuals will update themselves thanks to code borrowed from the Book of Shaders.
To start with, we need a texture. Different textures produce widely varying results, but here’s one good one using iq’s voronoise.
So. Let’s think about the physical way the time-tunnel is created. A given frame can be thought of as composed of a large number of concentric rings, each one corresponding to an exposure of the circular slit imaged at different distances. If a strobe was flashed as the camera moved, there really would be a bunch of visible rings.
If the transparency never moves, the rings in the final image will all correspond to the same ring in the original. Let’s decide that it’s the unit circle (centered at the origin with radius 1). To find how to color a particular pixel, we are going to divide it by its distance to the origin. This will scale it up or down to lie on the unit circle.
Well! That looks about right. It’s got the feel of a Star Wars hyperspace jump. The problem is, we’re mapping everything to the same slit without moving the pattern, so to speak.
We need to displace the pattern horizontally, but how much? It turns out the right answer is exactly 1 / length(pt). This was arrived at by motivated guessing, but the explanation is fairly straightforward. In general, the apparent size of an object is proportional to the reciprocal of its depth in the scene. The inverse of the distance to the origin is exactly how far along each ring is in the tunnel, and we want to paint the texture along the inside of the tunnel.
And suddenly (shockingly) we’ve found ourselves in a time tunnel.
With a few tweaks, you can animate the tunnel and begin to approach the original effect.
What’s really fun is that we really are mimicking the original analog transformation, all without drawing a single polygon. I misspent a few hours hand-painting a texture, and managed to render a tunnel whose outlines match the original more or less exactly, so I am confident that this transformation (ignoring constants) really is equivalent to a slit-scan.
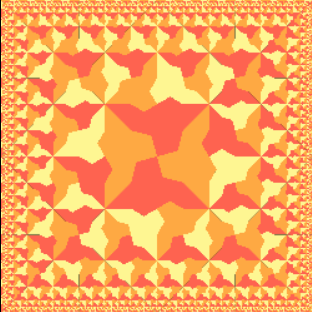
Perhaps you want a different shaped tunnel. It’s quite easy to induce different shapes simply by altering the distance function. Instead of taking length(pt), we will use our own function. By and large, a graph of the contour lines of this function will reflect the apparent shape of the tunnel. Comment out the marked lines here to experiment with different distance functions.
I also have a version of this published on Shadertoy (warning: autoplay sound). That’s all for now! There is surely more to explore here- for instance, I haven’t found any obvious distance functions that approximate a TARDIS outline, or Tom Baker’s head…
 Building Escher's Square Limit in Pixels
 Infinite Regression: Many Pictures From One Function
 Drawing fractal Droste images